I need a new knitting (and crocheting) tote. I haven’t looked yet and I know the options are probably out there, but I know I need one. My current bags have two issues:
Too small. I don’t want anything HUGE, but my current bag is pretty small. These days I’m working on multiple projects at once and need room for projects and supplies. (Fine, and snacks.)
No lining. I need something that doesn’t cause my projects to pill! As I work on longer (physically and chronologically) projects, I find that the beginning of the work is getting pilled and fuzzy.
I’ve never tried anything as large as a blanket, but I’ve done pillows and scarves and stuff with length and I don’t know how to manage any more bulk. I think a smooth/silky liner in my project bag will do the trick, but I’m not really sure.
How do you keep your projects from getting damaged as you work on them?? Suggestions welcome!
I’m taking another class at my awesome LYS, Harps and Thistles Yarn Emporium. It’s an introductory class for stranded colorwork and follows Staci Perry’s (of VeryPink Knits) Color My Cowl pattern, which can be found on her website or Ravelry or her YouTube channel …and probably other places, too. The VeryPink Knits YouTube has always been one of my favorites for tutorials. Staci’s very skilled AND is able to explain techniques so a beginner can understand. So, between the tutorial video and my Harps instructor, Doris Lewis, I’m doing stranded colorwork! Who woulda thunk it??
Stranded colorwork is the generic equivalent of Fair Isle, which has a lot of specific requirements to truly be considered Fair Isle. I’m not about that life, so #fauxfairisle works for me. It’s actually MUCH easier than I thought it would be. I was really scared of it and assumed I’d never make anything with multiple colors in a row, but it’s not bad at all. Now, with that said, I wouldn’t have attempted it on my own, but with YouTube and a real life instructor, I was comfy enough to do it.
The fun starts with the coloring page (available with the pattern on the VeryPink website). Options are truly endless for colors and patterns, though the pattern is probably best suited for 3-5 colors. I chose to modify the pattern a little bit to end up creating a theme cowl with a nod to The Ohio State University. My main color is scarlet, the geometric pattern is in grey, and I created block Os in white. You can see the original pattern and my modifications below. I already have other sports team related requests popping into my queue from friends!
The pattern is pretty easy to remember once you get past the first couple stitches of every row, which breaks pattern because you’re on circular needles. The only complaint/correction I have about the pattern (and no, I have not mentioned it to the designer, I’m just adding it here as an aside) is that the first stitch in rows 21 and 29 don’t match up to the pattern. If you want your four little accent stitches to fit together properly in the round, you’ll want to bump 21 up to 22 and 29 up to 30. The yellow arrows show how the pattern will turn out if you follow as written, with the green arrows to show how the design should look. I’ve bumped those two stitches for all the repetitions I’ve done since the first.
This post has turned out WAY longer than I intended, so I’ll close with a pic of my current progress:
Let me know if you’re working on this cowl or other stranded colorwork for the first time and how it’s going for you! I’ll keep posting on Instagram under the #colormycowl hashtag, so feel free to find me over there as well!
I know I promised a progress post on the cowl I’m working on (and a learn to crochet post, if I’m being honest), but I’m not ready for that yet and I needed to rant.
Two of my current projects are on wooden needles. One was a beginner mistake, before I really knew my preferences. The cowl is also on bamboo out of necessity – my LYS (local yarn shop) was out of what I wanted and I had to start the project for a class. Wooden needles are so… awful. I hate how they feel, the friction, the raspy feeling on my skin, on the yarn, the slow knit… ugh! As soon as I can get to the shop, I’ll be buying what I need in metal so I don’t lose my mind.
What’s your needle preference? Bamboo? Plastic? Aluminum?
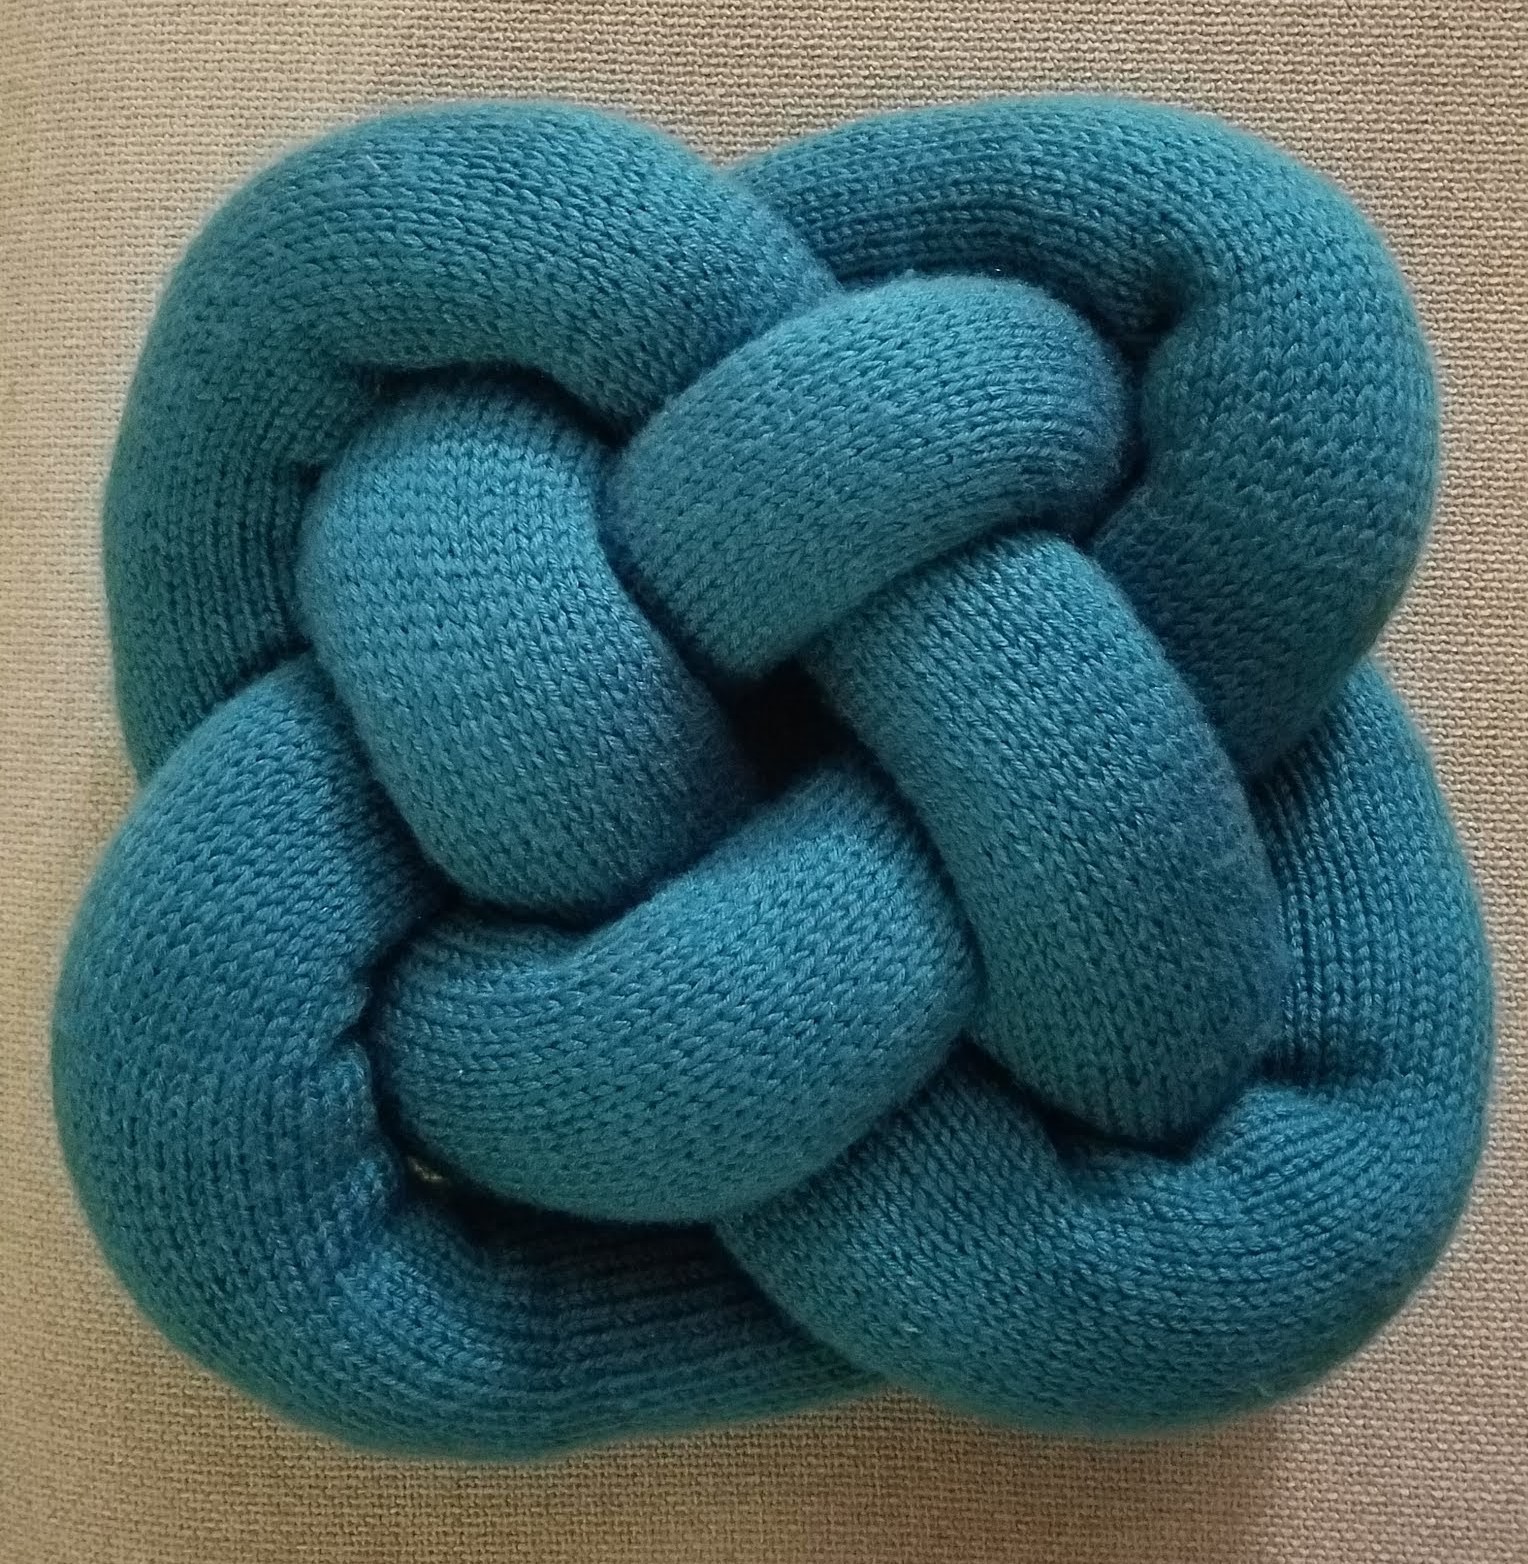
I’ve completed the Celtic Knot Pillow from Knit Picks after starting it two years ago! It’s a free pattern that I found while looking for gift ideas and it’s finally in the hands of its recipient, my Momma.
Knit Picks – Celtic Knot Pillow
Once I really started knitting in earnest, it took me about a month to complete. The knitting was the easy (and annoying) part. The pattern is literally just knitting the tube for 8ish feet. I stuffed the tube with polyfill as I went along; stuffing every 9-12 inches so that it wouldn’t be so difficult at the end. While this turned out to be a very smart choice (I can’t imagine trying to do it with the full length of the tube!), it made for an annoying and heavy tail as I finished more and more of the length. I used the magic loop, so I knitted and flipped, knitted and flipped, and the flip got heavier and heavier as I knitted.
Once the knitting was done, it took me over an hour to get the knot right! The illustration on the pattern was not sufficient and the author recommended website didn’t do the trick for me either. After lots of Googling, I found that searching for “turks mat” got me to the most useful images and videos. I ended up using a YouTube video by WhyKnot (from 5sec – 1min 10sec) to really get me where I needed to be. Even with all the gifs, images, and videos I found, I still struggled – though I am pretty spatially challenged. The two things that ended up being the lightbulb moments were: 1. The initial tail that begins the knot needs to be longer than I expected, because it ends up being bent back to the back side of the pillow to be seamed with the working end. 2. Once I got the knot right and my ends seamed together, I could still adjust the knot to fluff the stuffing in certain areas or move the stuffing to decrease/redistribute the stuffing in others, as well as manipulate the knot to determine where the seam would end up.
Overall, it was a pretty simple, fun project and I’m really pleased with the result. Hopefully Mom likes it too! Now that I’m back in the groove, I hope to pick up one or more of my hibernated projects very soon. (I’m also taking a crocheting class in January, but that will be another post…)
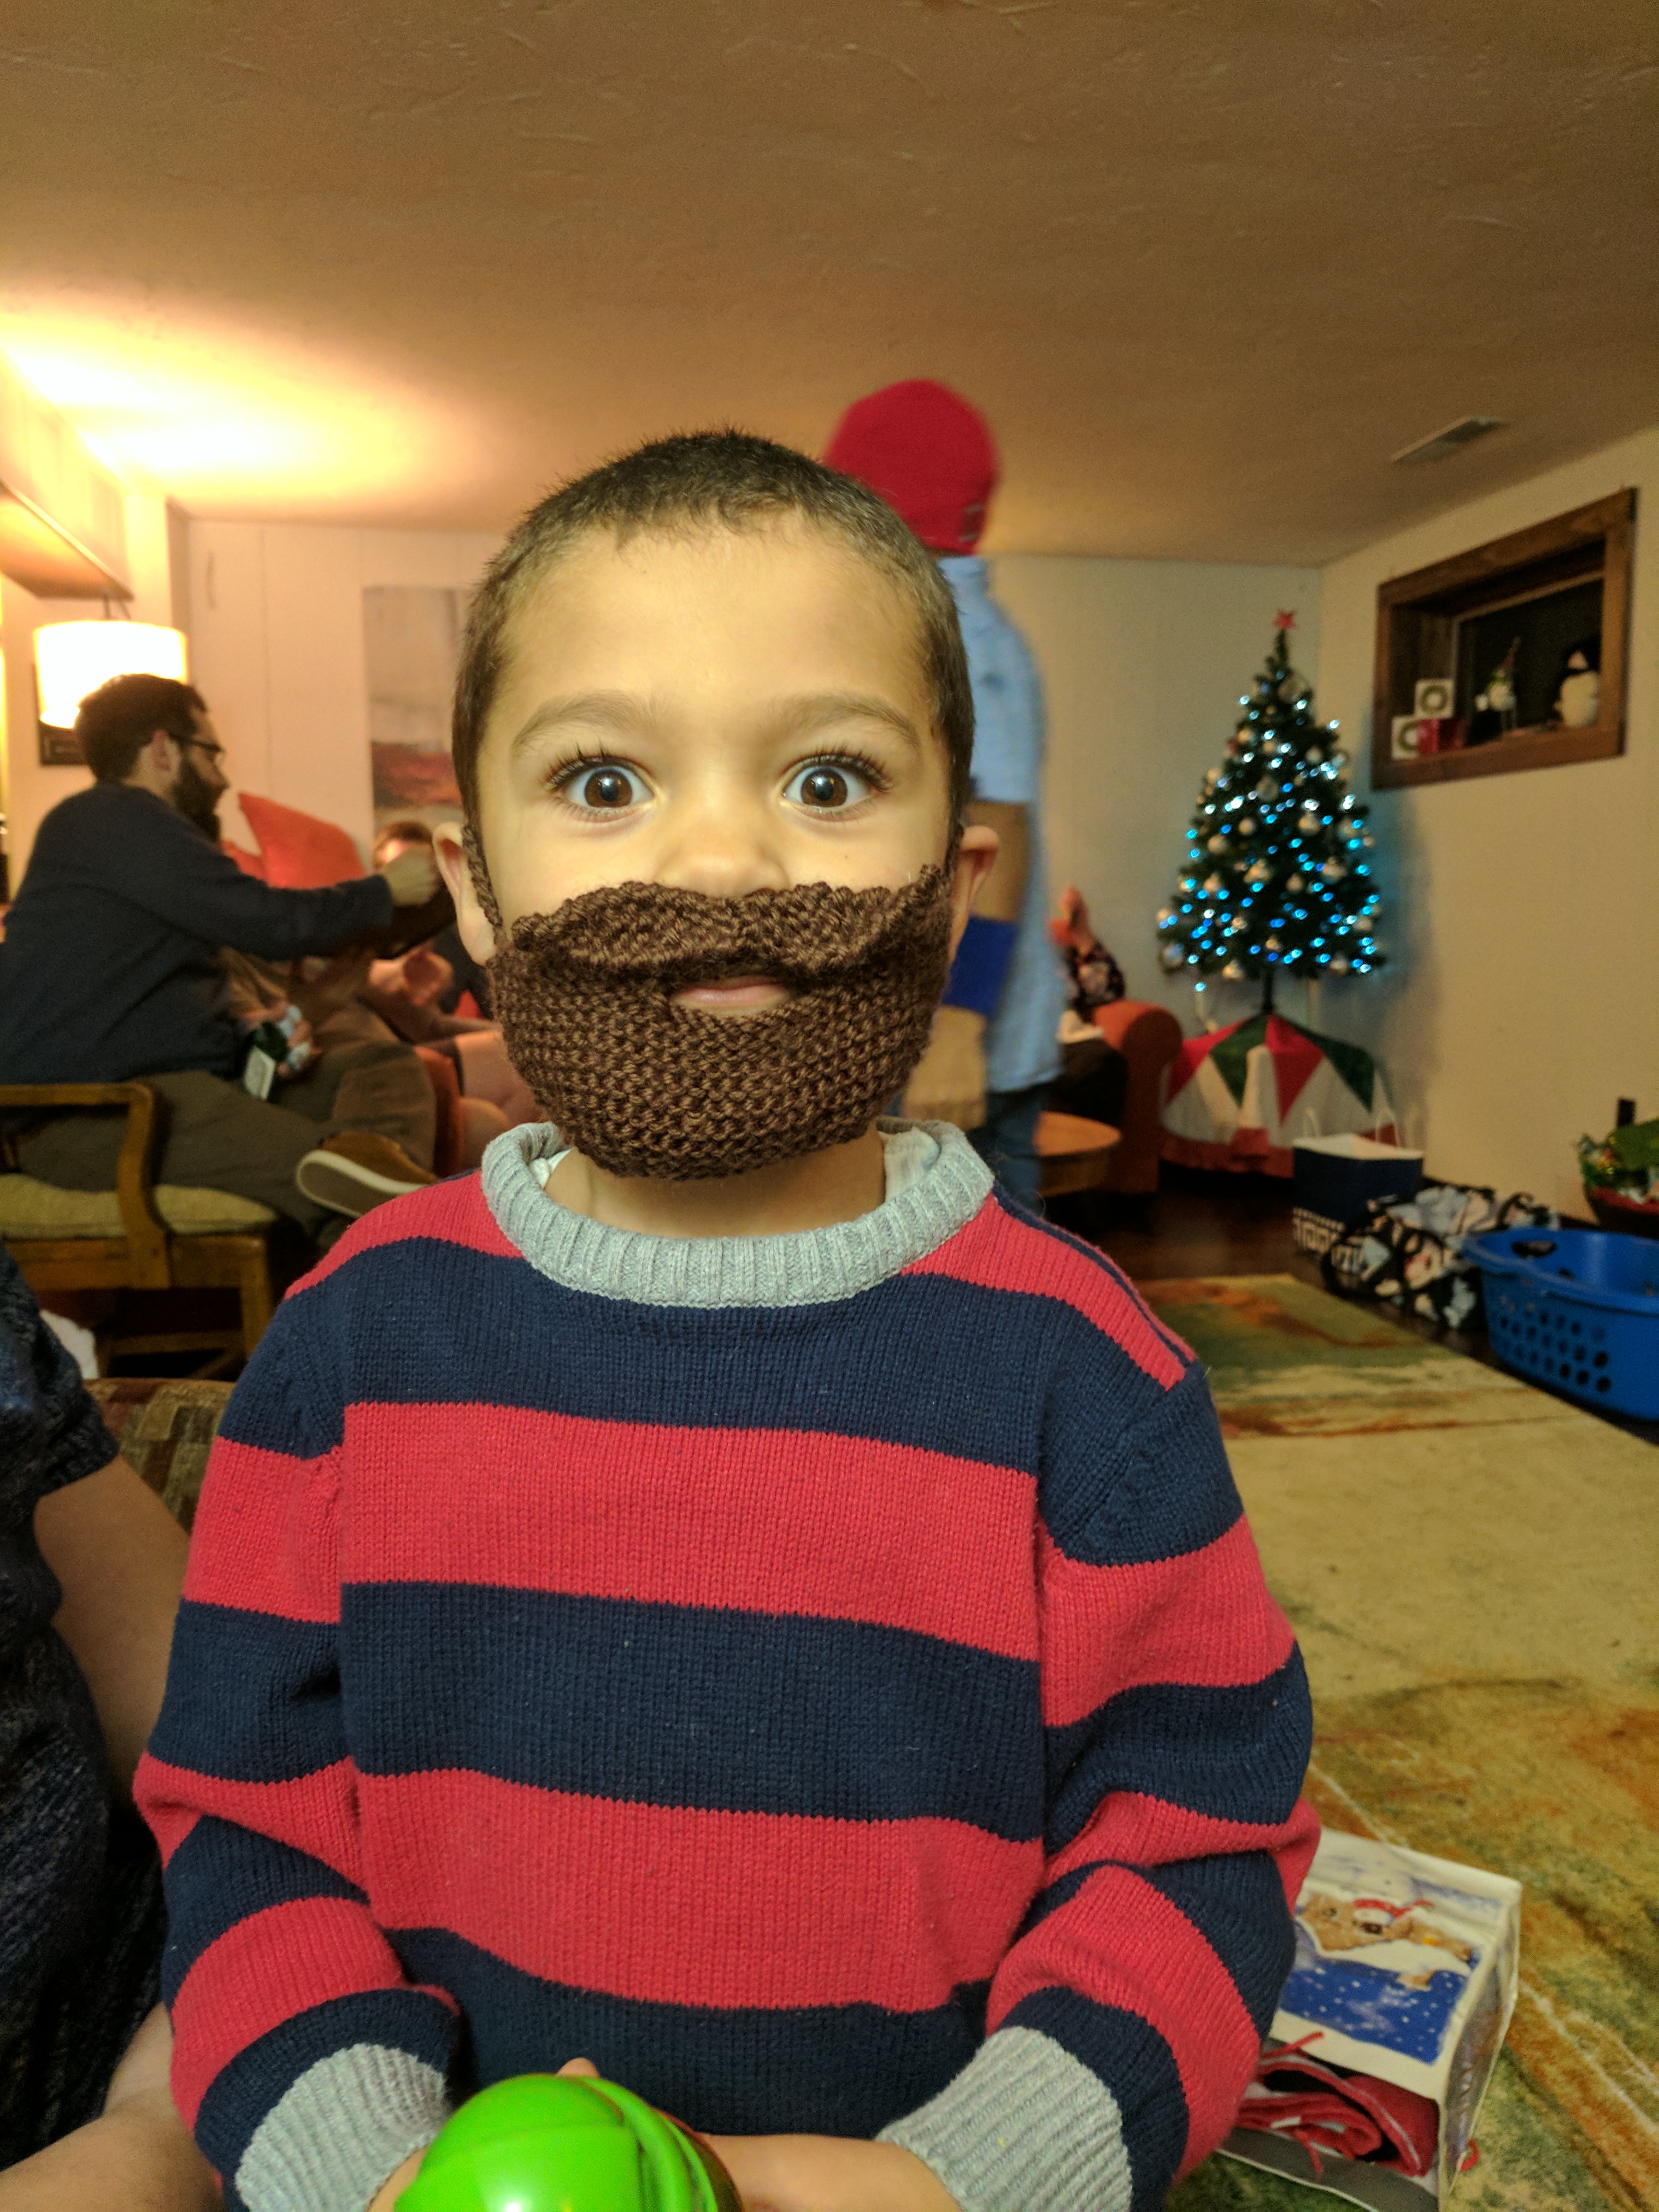
The Christmas beards were complete for Christmas! I basically rewrote the whole pattern after trying time and time again to get an end result I was happy with. It challenged me to think as a designer and a “real” knitter to think about what I wanted them to look like and how to get there. The details are on my Ravelry projects page if you’d like to see them.
I was going to blather on here a bit more, but I just want to get my adorable models (great-nephews and –niece) up on the blog!
I think I’m officially a knitter. I buy yarn I don’t have a plan for. I buy needles “just in case” I might need them for a gauge issue or an impromptu project. My stash is overflowing its designated area and I have no concrete idea of what I have on hand and what I don’t.
What methods to you use to keep your inventory organized? Notes jotted down and kept in your wallet or on your crafting table? A spreadsheet? Ravelry? (I’m neopurl, btw. Add me if you want!) An eidetic memory?
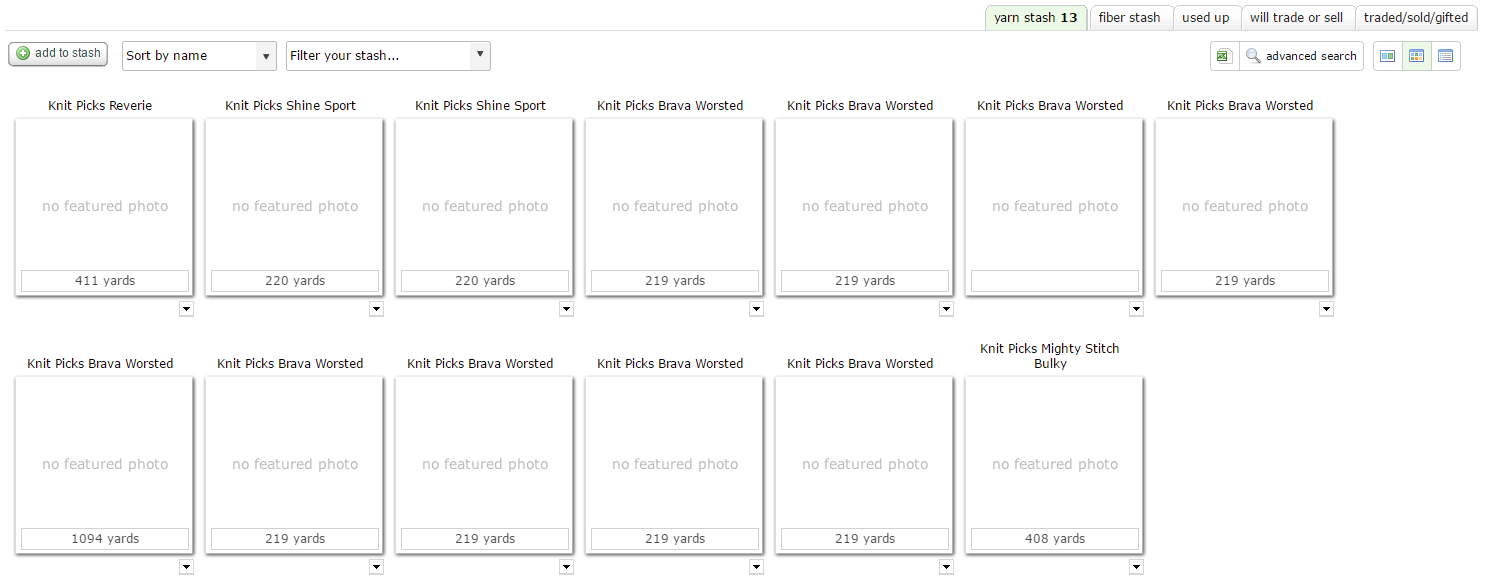
I think I’m going to try to use Ravelry’s Stash and Needles & Hooks functions more effectively. You can add the information about any yarn or needles you have on hand so you’re immediately able to tell if you have what you need for a project. Unfortunately, that assumes you actually add the information. That’s where I’m at right now. Sometimes I add, most of the time I don’t. It really is a great organizer, though.
The Stash page displays all of your yarns and the information you’ve put into the system.
You can use that to keep yourself organized or to advertise yarn that you’re willing to sell or trade.
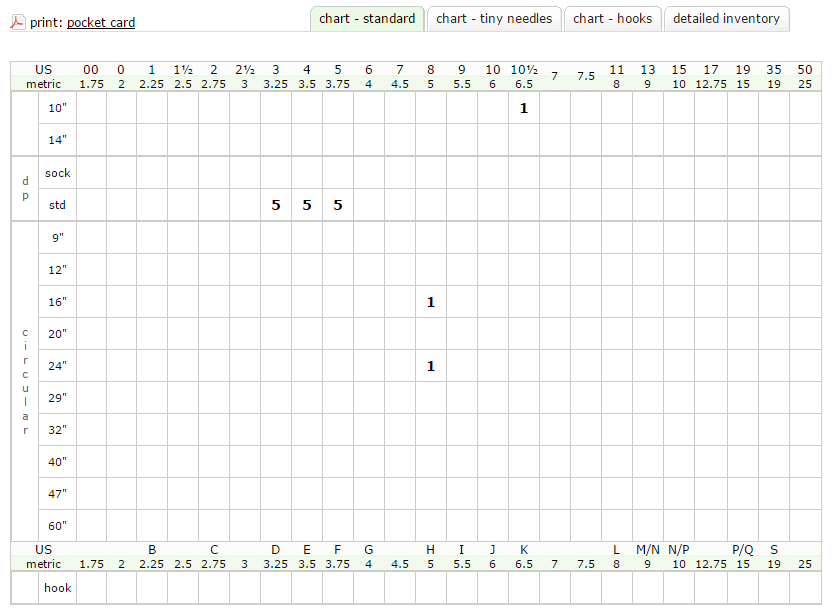
The Needles & Hooks area keeps track of the items of the same name. You can also print out a handy little pocket card to have your inventory at your fingertips.
As you can see, I’ve added a handful of items in both areas, but it certainly doesn’t reflect my whole stash. I don’t know if I’ll have time for it until my Christmas crafts are done, but I plan to get organized for the new year. …said everyone ever. Ha!
Let me know how you keep yourself from being buried in unorganized yarn!
As is so frequently said in knitting: Ohhh, that’s not nearly as hard as it looks!
I’m taking another great class at a great little LYS (local yarn store/shop, if you’re unfamiliar – it’s a fairly new term to me, too) with a wonderful instructor. This time I’m knitting a lovely scarf while learning how to create cables.
I’ve mentioned the shop before – Harps & Thistles Yarn Emporium in Cuyahoga Falls, OH. It’s adorable and well stocked and the owner is always welcoming, friendly, and helpful. Someday I’ll remember to take pics of the shop when I’m there.
The classes I’ve taken have all been taught by the same instructor, Meg Roke. Meg is an amazing knitter and published designer, as well as a patient and effective teacher. Her learn to knit class gave me the foundation and confidence I needed to keep pursuing the hobby and her skills based classes keep things engaging by introducing techniques required to create various garments. I’m currently learning to cable! As I mentioned in my opening, cabling isn’t nearly as complicated or difficult as I thought. Meg provides simple explanations, helpful demonstrations, and constructive feedback all while cracking jokes and telling success stories about other students. Look her up! You can find her on her website, Meg Roke Knits, Ravelry (as mooch), and Etsy.
So, back to the cables. Cables are actually super easy once you know how to do them. This is not a technical blog, so I’m not going to get too deep into it (you can find tons of info with a simple Google search, but I prefer YouTube videos (Knit Purl Hunter, knitpicks, and WOOLANDTHEGANG are some I frequent)), but all you need is one piece of additional equipment and the knowledge that you’re really just twisting a chunk of stitches behind or in front of another. I’ll experiment with the “additional equipment” I mentioned because, as Meg would say, it gets a little fiddly when working with something new like this and I prefer to try a few things before settling into my one best way.
I’m about 1/10 of the way done with the scarf and have completed the main part of the pattern that will continue to repeat. And really, it’s not nearly as complicated as it looks.
Ever bite off more than you can chew? No? That’s just me? Riiiiiight…
Really though, we all do it, don’t we? Whether it’s by choice (lots of fun, exhausting travel) or not (a promotion or personnel changes at work), we can get overwhelmed.
I’ve been overwhelmed with life and work for the last few months, but I’ve gotten to travel to some great places, see some great shows, spend time with some great folks and I’ve also been challenged at work to take on some anticipated and unanticipated responsibilities.
Now that all of that has slowed down a bit, I’ve planned WAY too many knitting projects. I’m excited and intimidated, but I think it will all work out for the best. I’ve signed up for a couple more classes for techniques I haven’t tried yet and I’ve decided that everyone I know should get a knitted gift for Christmas this year.
This is the mess I’ve gotten myself into. Hopefully I’ll have some more organized photos for you soon!
I’m still working on my sweater and I’m getting close to the end of my current skein. As some of you know from my oops post, I think I tried to do a (failed) overcast join and now have a bit of a mess than I’ve been ignoring. As another join approaches, I’m exploring different options. TECHknitting has a great post outlining ten different methods for working in ends, and that’s given me a lot of info and ideas. I’m pretty sure I’m going to try the back join for this transition.
But I’m really wondering what preferences are out there. I know that different applications (depending on yarn type, yarn weight, stitch, color, etc) are better suited for different types of joins, but what’s your default? If there’s nothing guiding you, what do you fall back on as your join of choice?
I went to my first group knitting activity (that wasn’t a class)! I don’t know how fond they’ll be of my blog title, but I think it’s a clever name for a knitting group, so I’m using it!
I had a nice Friday evening with my mother, my sister, and their little knitting group. They regularly get together on Friday nights at Black Locust Farm in Lodi, OH to work on ongoing projects, start new ones, and catch up on life and needlecrafts.
The owner of the shop is there to facilitate if there are any group knitting projects that multiple people are working on or if there are any knitting emergencies to diagnose or gauge measuring to do. Obviously, she’s open for business as well, offering a VAST selection of luxurious yarns and various other notions (including spinning accessories!).
It was a nice, leisurely visit with no pressure to produce or perform. One prolific needlecrafter had recently completed a Tunisian crocheted shawl that she brought to share with the group. The owner was working on a complicated project that she ended up frogging most of due to a mistake borne out of sleep deprivation (she’s also a nurse, in addition to owning and running the LYS). I was able to quietly knit my sweater, feeling no pressure or discomfort at being the newbie knitter or newbie to the group.
I wish I’d thought to take some pictures of the wonderful fibers and final products that are displayed throughout the shop, but I guess that means you’ll have to stop by and see for yourself.